__________________________________________________________________________________________________________________
This article will review:
- How to install the Partnerize Salesforce Commerce Cloud cartridge
- Access to additional technical documentation
__________________________________________________________________________________________________________________
Index
Overview
Partnerize has a LINK cartridge with Salesforce Commerce Cloud (SFCC) which allows brands that use SFCC as their eCommerce platform to easily integrate their conversion tracking using a pre-built cartridge. This integration uses a 1st party cookie tracking solution via a Partnerize tag. This ensures that the brand’s tracking is not reliant on 3rd party cookies, and is therefore ITP (and equivalent) compliant.
Before the cartridge can be configured for usage, the cartridge must first be installed into the brands SFCC site. The cartridge is designed for SFCC API version 21.3 (Compatibility Mode: 19.10) with:
- SG version 105.1.0
- SFRA version 5.3.0
The cartridge is designed with US locale but multi-locale and multi-currency support.
__________________________________________________________________________________________________________________
Implementation Steps
Import Cartridge
- Download the cartridge source code
- Establish a new digital server connection with your SFCC Instance
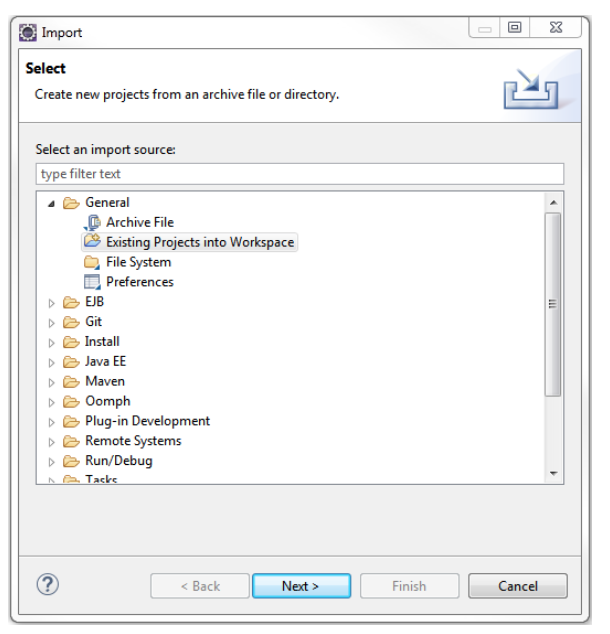
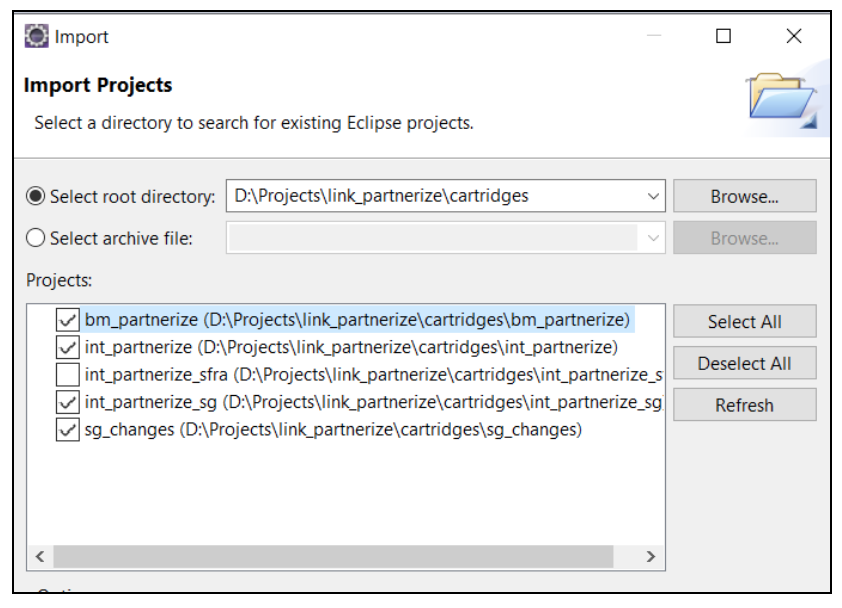
- Import cartridges to a workspace in Salesforce UX Studio:
- Add cartridges to Project Reference of Server Connection:
- Wait until Studio completes workspace build and uploads source codes to the sandbox.
Assign Cartridge to site
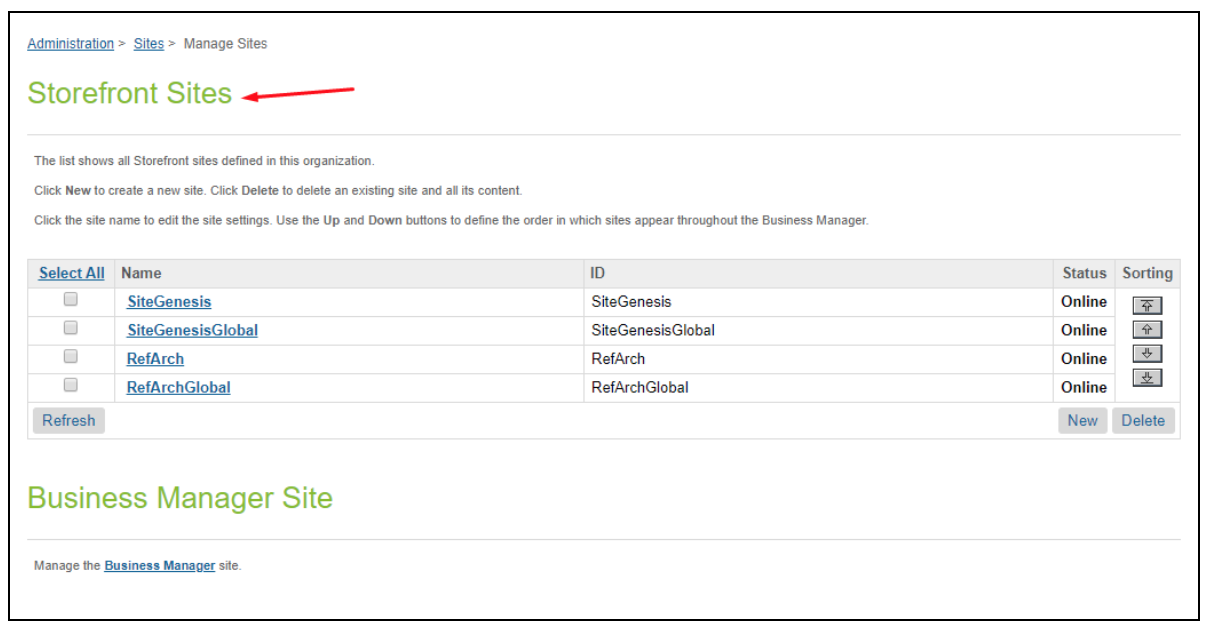
- Go to Administration > Sites > Manage Sites > Select your site from the list “Storefront Sites”:
- Select Settings tab. At the beginning of the cartridge path, add the following:
- SG:

-
- SFRA

Assign Cartridge to Business Manager
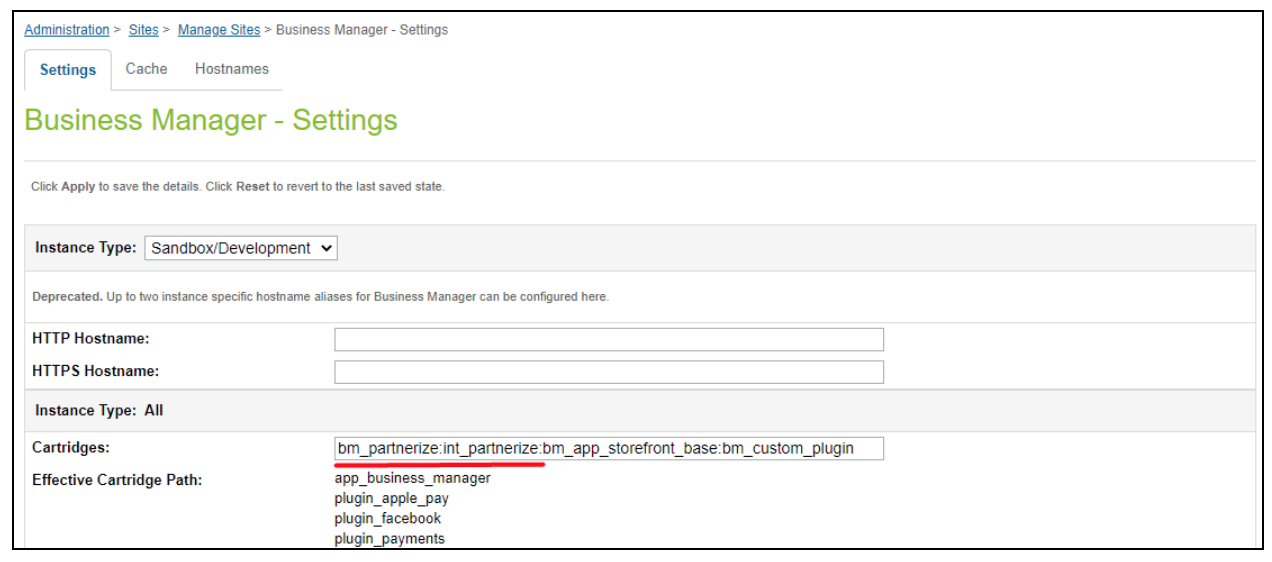
- Go to Administration > Sites > Manage Sites > Select “Manage the Business Manager site”
- Select Settings tab. In the beginning of the cartridge path add the following:

- Click Apply button
Import of Metadata
- Go to Administration > Site Development > Site Import & Export. Upload partnerize.zip from metadata folder:
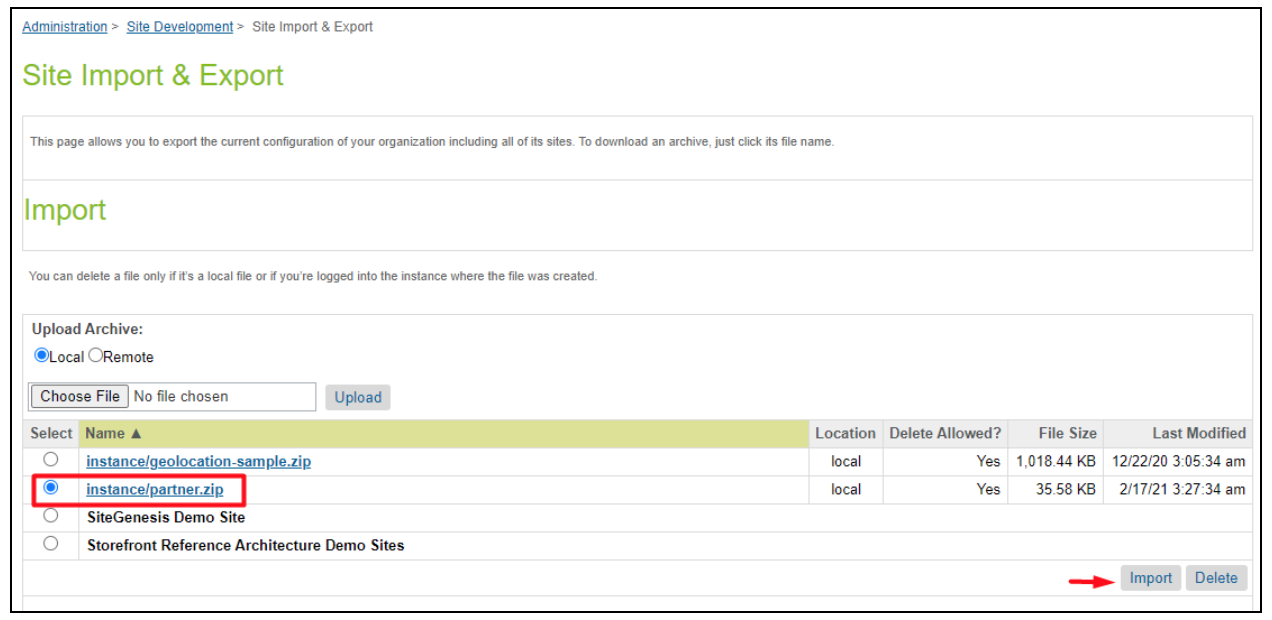
- Select partnerize.zip and finish the import process.
Enable Partnerize BM extension
- Go to Administration > Organization > Roles & Permissions. Select the user group that you want to allow access to Partnerize BM extension (Administrator for example):

- Select “Business Manager Modules” tab
- Select the site for which you want to allow the use of Partnerize BM extension (i.e. SG or SFRA)
- Set the checkbox for Create Partnerize Tag for Business Manager Module and click “Update” button
Custom Code
SG - Perform changes in controllers
- YOUR_CARTRIDGE_controllers/cartridge/controllers/COSummary.js
- Put the following rows in line 71 to the submit() function:

SG - Perform changes in templates
- YOUR_CARTRIDGE_core/cartridge/templates/default/components/footer/pageFooter.isml
- Put the following rows in line 24 to the and of <footer> section:

- YOUR_CARTRIDGE_core/cartridge/templates/default/checkout/confirmation/confirmation.isml
- Put the following rows in line 15:

SFRA - Perform changes in templates
- app_storefront_base/cartridge/templates/default/components/footer/pageFooter.isml
- Put the following rows in line 33 to the and of <footer> section:

- app_storefront_base/cartridge/templates/default/checkout/confirmation/confirmation.isml
- Put the following rows in line 12:

__________________________________________________________________________________________________________________
Next Steps
- Configure the SFCC cartridge, following the instructions here.
__________________________________________________________________________________________________________________
FAQ's
Please refer to our Salesforce FAQ guide here: Salesforce FAQ's